

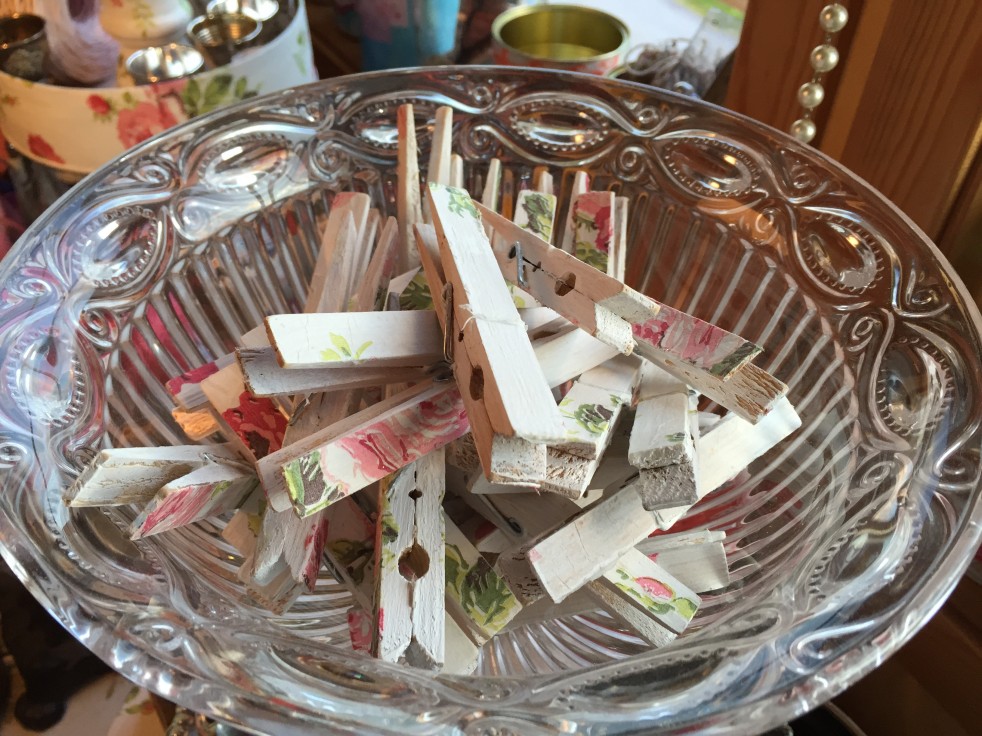
Every once in a while I like to glue stuff! Or more specifically, decoupage stuff! So today I’m sharing a tutorial on decoupaged wooden clothespins, that I have made a huge pile of, and use for many different purposes all around my house:
Here’s the very easy instructions on how to make these:
1. Paint the clothespins white. I started out painting the “inside” very roughly, then each of the sides, clipped the pin onto the piece of cardboard they came on and finally painted the front side. I used acrylic craft paint, and just brushed it on, one uneven layer does it! (Warning: you will have to hold the pins with your fingers to paint the inside/sides and there is no way to avoid getting paint on your fingers… prepare for messy! Luckily the white acrylic paint comes right off with soap and water…lol)
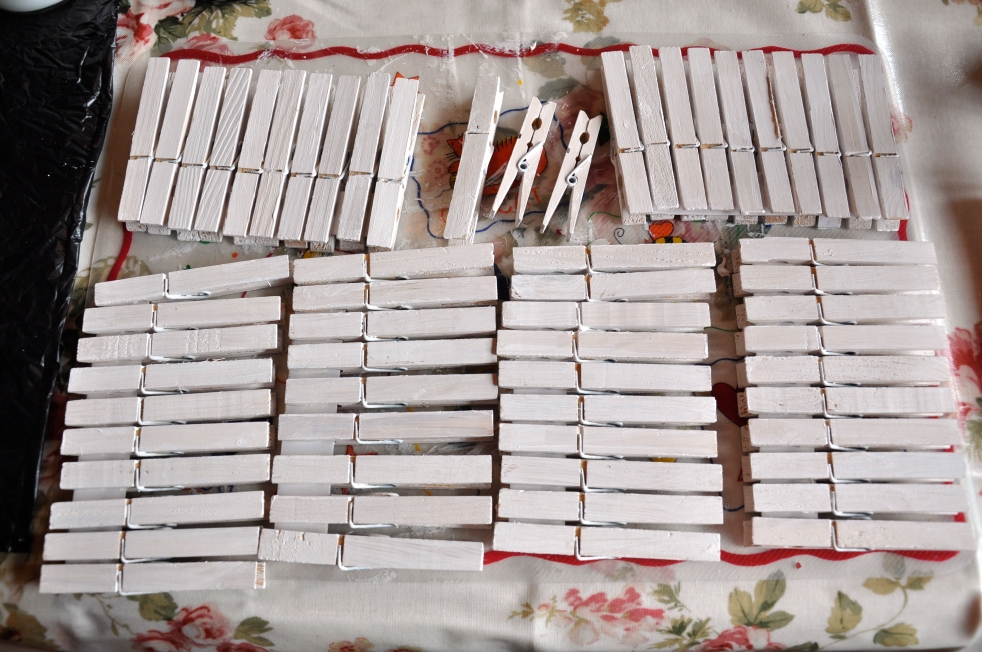
2. When the paint is dry (approx 30 mins with my cheap craft paint) flip them over and paint the flip side too.

3. Brush a coat of decoupage glue onto the pins. For these there is no reason to use the most expensive glue you have, 2 parts Elmer’s glue mixed with 1 part water does the trick! 😉
4. Lay the top layer of a pretty napkin on top of the pins, and brush some more glue on top too! Leave to dry.
5. Flip your pins over and repeat steps 3&4 on the other side.

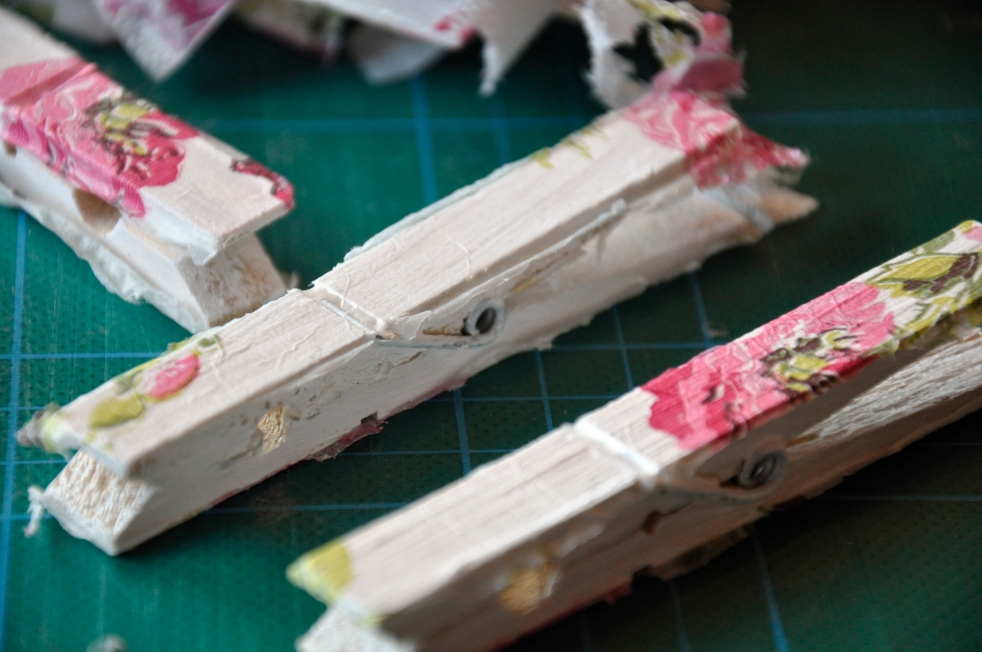
6. Cut between each pin with a craft knife, flip them over and repeat on the other side.

7. Then unfasten each pin from the piece of cardboard, and sand the edges to remove excess napkin.
8. Put your new decoupaged clothespins in a pretty jar on your craft desk, in your kitchen, or anywhere you desire, to admire your little beauties regularly 🙂

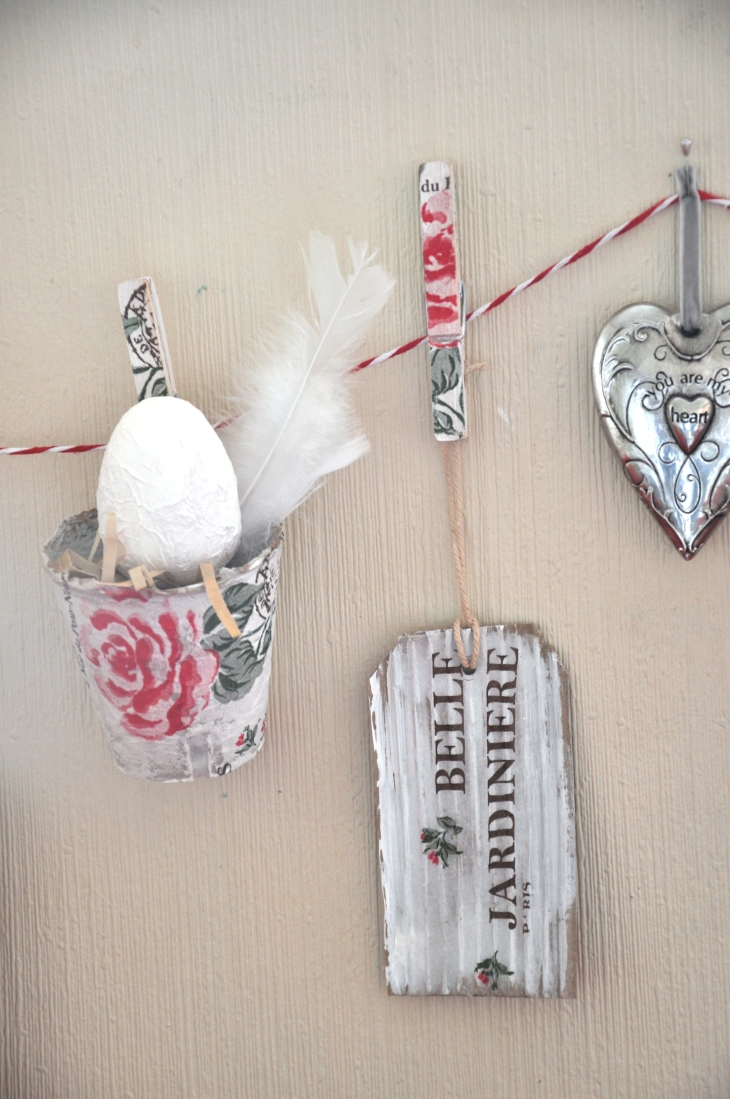
9. And don’t forget to USE them (click on the images below to see the original posts where the pins were used):


Did you enjoy this post? If you are not already a confirmed follower of Wings of Whimsy, please click “Follow” to register and make sure you don’t miss future posts on WoW:
- WordPress-users: in the top left corner of your browser window to register your WordPress-account
- Other readers: in the bottom right corner of your browser window to register your email-address
")
 Follow me on Pinterest:


Love this idea, it looks so easy – apart from the sanding! I am sure I can make a mess of that!
Thanks Darling 🙂 I think the trick that makes this easy, is clipping the pins onto a piece of cardboard (I used the piece they came with) thus you can treat 10 pins as one set 😉 Although there is still some induvidual work involved, when first painting, and sanding in the end…:-P But you’ll be surprised at how easy they are to sand, there is no problem with sanding “too much”. There is however the issue of dust, if possible I’d recommend sanding outside to avoid dust in your craft space, and using a mask if you are sanding many at the same time…! xoxoxo
Ohmagosh, these are so cute. You’re more patient than I, though, as I believe I’ll try spray painting them first, then the decoupage. And seeing the little paper dolls with their gold halos — oh so lovely! I can’t wait to print and cut them out. I’m 68 years old, but I tell you, I will never outgrow my love of paper dolls and folks can just think I’m nuts if they want to, but that’s how I feel. Who is the little baby in the next to last photo? She’s just adorable — can’t look at her without smiling too! All your posts are so good, but this one was just chocked with goodies. Thank you Gunnvor!
Hello Dear 🙂
Spray paint would definitely speed up the covering process, although I’m a bit uncertain if it would cover well the little nooks and corners “inside” the pins… and you might also need to spray each of the 4 sides individually…? I’ll share another secret about these: when I buy the plain wooden clothespins, I always look for the roughest surface…! I think that adds to the texture of the finished pins…lol! Good luck, and please let me know if you try this with spray paint! 😀
The little baby is my grandmother at age 1 in 1910, her parents wedding photo in front (1908). You can read more about her if you click on the picture, and also download the image, if you want to use her in your arts&crafts projects 🙂 xoxoxo
These are sooooo beautiful sweetie. We have used this many many times, and also often done it with the big megapins, and then made them with magnets on the back, so they can hang on the fridge f.ex. and hold all the small memorynotes, we all have all the time. And the girls usually make some for christmas too and decorate them for that occasion ofcause, and then they look awesome as pure decoration, and can still be used for that purpose anyway. I also made some of the small ones for my sister quite a few years ago. She was collecting Orchids, and could never remember all the different names on them and the very special treats they all needs to survive, so for her birthday I made all these decorated pins and made a small notecard for each of them, with the name and special treats, each of them needed, and decorated the edge around the card with the same paper as the pin, and glued them onto some nice pots for them. Then it looked decorative, and she didn´t have to go and find her book every time she needed to do something, and these would look so pretty for that purpose too.
I hope, you´ll have a wonderful day today sweetie and also a great and wonderful week-end ahead. I´ll have the girls this week-end and tomorrow, we´re all going half way through the country and attending the biggest craftfair, that is had here only once a year, so we´re so looking forward to that, and to see all the new stuff we´ll get to see there. Will show you more from there later, as I´ll be making an article from that in the webmagazine next week.
Have a lot of crafty fun and take good care.
Biiiiig warm hugs from me
Hello my Darling!
I’ve found a local store that carry the larger wodden clothes pins. If you look at the picture of the white pins (step 1 of the tutorial) you can see 2 smaller pins in that picture. Those smaller ones are the regular size…;-) I have made several of those too, but have landed on the larger ones as my favorite 🙂 Also because they are a lot more rare…lol I have not tried adding magnets to those, but I’m sure they’d hold the paper bits on the fridge, so I might do that now…lol Thanks for the tip 😀
I’m not too crazy about the supersized ones, I find they are too chunky for my liking.. but I can definitely see them as a fun option for the girls to make christmas presents 😀
Enjoy your trip to the craft fair, I can’t wait to read all about it!! I’ve been deep diving into the huge Panduro box I received after my online shopping spree, so I’ll be first in line to agree that new stuff is an amazing inspiration booster 😀 Have a lovely weekend!! xoxoxo
PS Thanks again for the hugs, they were just what I needed 🙂
You have such a wonderful and practical imagination. And so generous, too! You make the world a better place.
I know I won’t say thank you for each post. But I keep and treasure every email. Thank you, thank you, thank you!
Dear Cully!
Thank you so much for your wonderful comment!!! My blog is still very small and new, so I don’t expect loads of comments, I am sooo happy to receive encouragements like this 🙂 It is so very, very inspiring and rewarding 🙂 I wish you a lovely weekend, and hope you will continue to enjoy my little corner of the web 😀 xoxoxo
Gunnvor I always enjoy your site so much.
You have the most amazing and wonderful ideas. Our Christmas is going to be much prettier and more fun because of you.
Thank you for sharing your lovely work. xxx
Awwww, thank you so very much Dear 🙂 I hope to be able to share a few more posts with ya’ll before Christmas, hopefully you will find even more goodies to enjoy 🙂 xoxoxo