
I love printables just as much as the next guy, and I’m always looking for inspiration. Google used to be my religion, I think I have converted to Pinterest!!
Here is a fabulous French Perpetual Calendar I found, posted by pillpat on Flickr, she has thousands of french pieces available from the public domain:


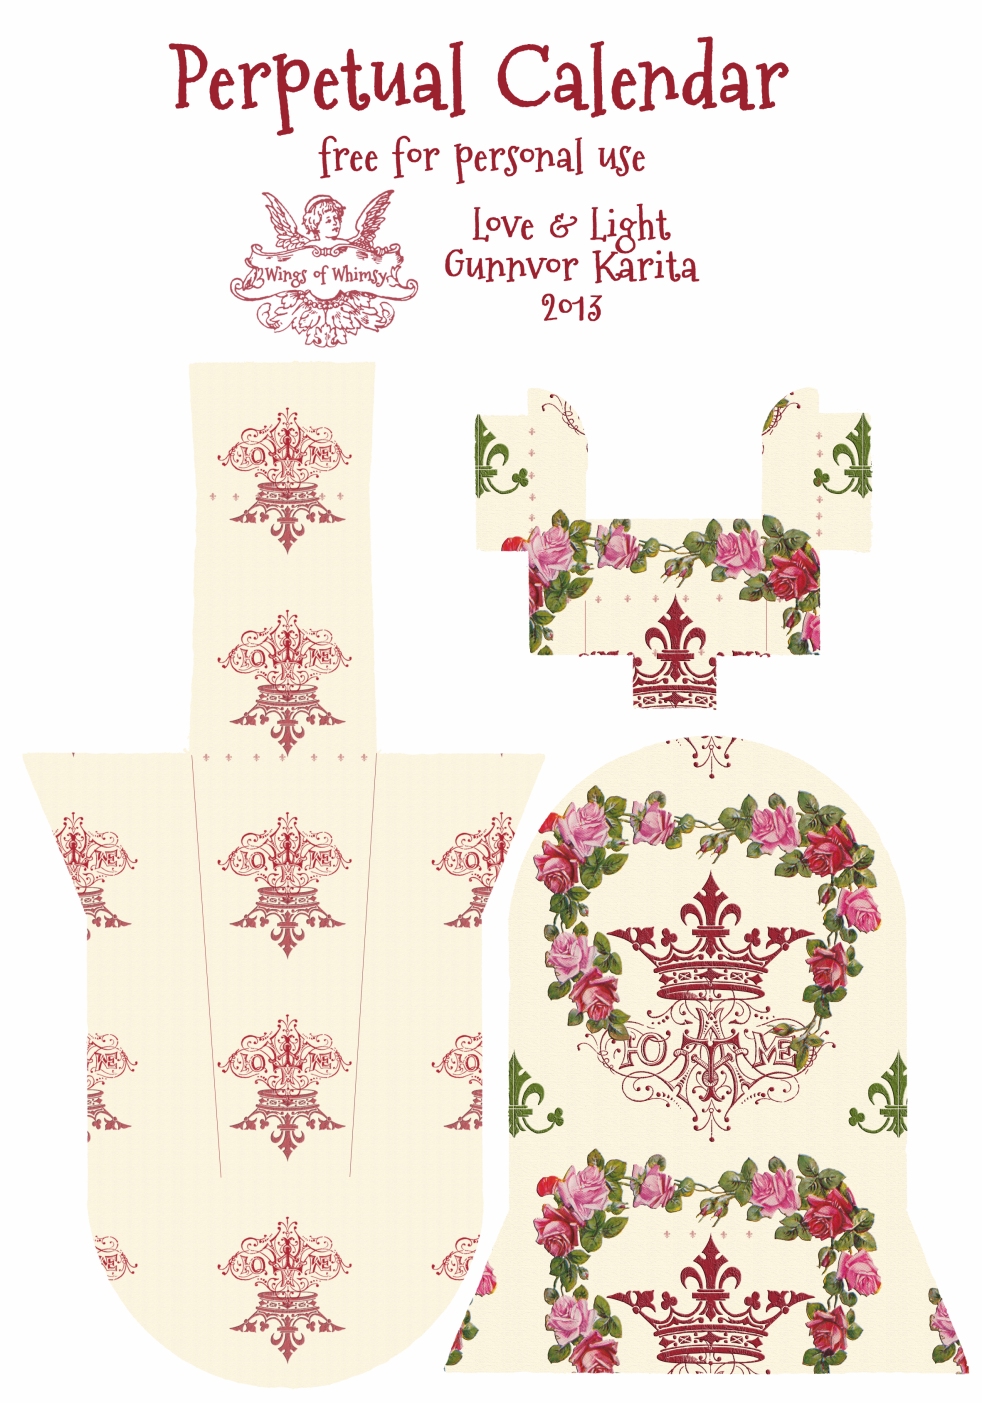
I could not resist cleaning it up (above version), and using the template for a “Queen At Home” version of my own:


To make sure everyone is happy, I decided to make both pink and green versions, and both in French and English! So grab your favorite combination, print, cut, fold and glue, and have the most adorable little desktop calendar in mere minutes! I have a French one in the kitchen, next to our breakfast table, thinking the girls and I can use it to learn weekdays and months in French 🙂


These files are free for your personal use and enjoyment 🙂

PS Do you love the “Queen At Home” style? Go to the previous post to download the seamless tiles and 5 different free printable papers 😉

I see no way to download?
Click on the ones you want, and they will open in new tabs. From there you can download the images in very high resolution by right clicking on them 🙂
Thank you very much for the vintage calendar, to download. It is very nice, and I’ll enjoy having it on my desk. I found your blog on pinterest.
Thank you for visiting, and for leaving me a lovely comment, it is much appreciated 🙂
These calendars are sooooo beautiful ♥!
Would they also be available in German?
Many thanks in advance, Claudia
Thank you for the lovely commetn Claudia 🙂 I can make you a German version, please let me know what color you want? xoxoxo
Wow – thats sooooooooooo nice from you ♥! Pink would be perfect for me – thanks a lot in advance dear Gunnvor ♥
I made German versions in both colors while I had the file open, and put them in the download folder here: https://drive.google.com/folderview?id=0B6zHNcENk0-3X2JhZVRVRE5ucnM&usp=sharing
Enjoy 😀
You’re the best Gunnvor!!! Thanks so much for your work ♥
Hugs from Switzerland, Claudia
This is really cute! I just did a practice one on regular computer paper. I kind of messed up the the little part that holds the date…the rose one doesn’t have little cut lines for that part, so I wasn’t sure where to clip the sides. Are you supposed to do it on card stock? So CUTE! 🙂
Hello Hunny 🙂
I recommend printing these on cardstock, I think the paper I used in the pictures are 130g, but if I were to make more now, I’d go for even thicker paper. The wear causes the backing easel to cave after a while if the paper is too thin…:-P
As for the guidelines, I did simplify them on my Queen at Home design, look for the tiny fleur-de-lis for a guide on where to attach it 😉 Lines are where you cut, fleur-de-lis dots are where you fold or attach. I hope you can make it work 🙂 xoxoxo
Is this calendar available in a black outline version? Thanks
I’m sorry, I only have made the versions available here. I could consider making another version, if you tell me a bit more what you need? When you say black outline, do you mean like a clear template? xoxoxo
Yes, I do activities with some girls at church and we always make a calendar in January. I would like to use this template and copy it onto some cute scrapbook card stock paper. They always come up with some crazy color combinations!!
Ok, here’s what I can do: I can create the sheet with the calendar itself as a template for you to copy onto any paper, provided you can use the number sheets “as is”? Please let me know if this will work for you? xoxoxo
Yes, that will be great!!
You have mail 😀 xoxoxo
Hello! I like your post … I do not understand where to cut or fold the paper to change the numbers and days, on your blog where I find the guide to do so? Thanks I’m from Mexico and I found you on Pinterest
Hello Lilz 🙂 Cut out all the individual pieces, and then stack them into the small pocket created in the front of the calendar 🙂 The Day-pieces are the longest, and go in the back, the dates are the medium size and go in the middle, while the months are the shortest pieces and go in the front. To use the calendar you have to keep moving the pieces around in the pocket from day to day 😉 xoxoxo