

Here comes batch 2 of type 5 of the easy paper Christmas ornaments in various vintage bauble shapes. I know I said yesterday that this is the most labor intensive ornament, but be comforted by the fact that my 13 year old daughter Guro immediately faved these, and so far has made 5 or 6 of these:

Please ignore that she hung one ornament upside down…:-P
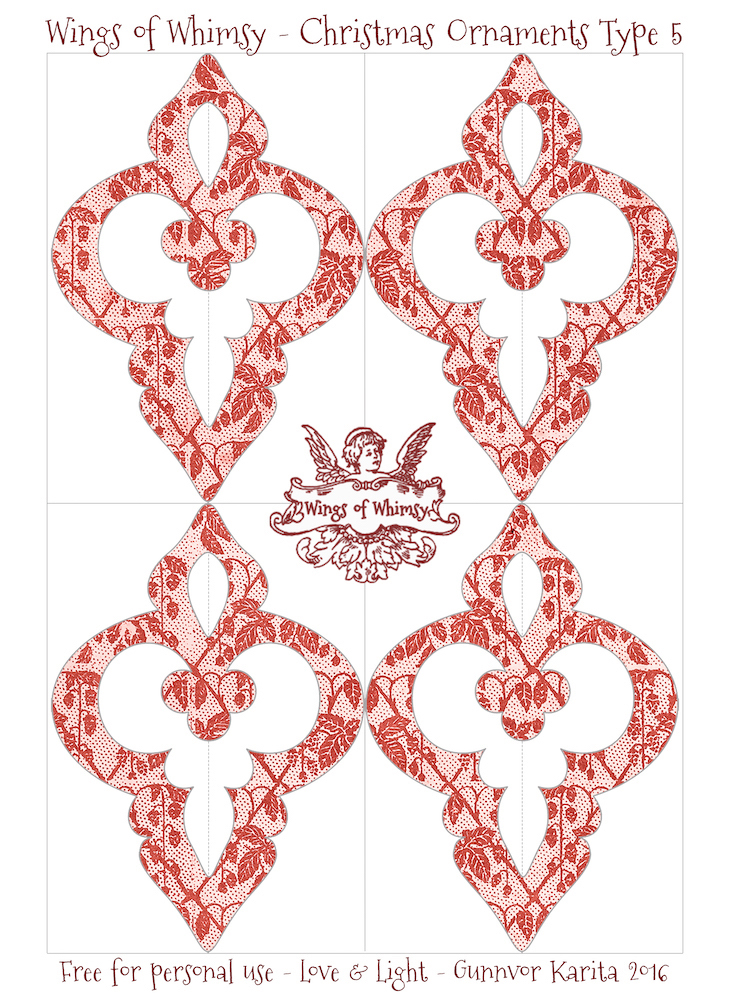
Today’s batch:


 I highly recommend using the technique from Type 4, by glueing the pieces back to back before cutting around the outer sides, but you must cut away the inside parts first:

INSTRUCTIONS:
- Print the ornament on cardstock, my go-to paper is Canon Matte Photo Paper (160g)
- Score on all the vertical lines and fold the pieces down the middle with pattern facing outwards
- Cut out the inside part and remove it (you might want to use a sharp craft knife for the details)
- Unfold and refold the pieces with the patterns facing inwards (like in the photo above)
- Carefully align the pieces as best you can
- Glue the pieces back-to-back, to create a 3D ornament (I use an ordinary glue stick for this)
- Cut out the 4 sides
- You might want to subtly ink the edges, to avoid seing the white paper…
- To hang, either punch a hole and insert ribbon, or sandwich the ribbon in the middle when glueing the pieces together
- Optional: I used spray glue and glittered the whole ornament for some grand seasonal sparkle 🙂
- Optional: For some of my ornaments I also glued glass glitter on the edges. I used silver, and gold, and even pearl for some, which gives a beautiful frosted look. If you opt for glittered edges, you can skip the inking 😉
- TADAH: you have a lovely 3D ornament to decorate your tree, or hang in a window 🙂

The files are free for your personal use and enjoyment. Go to the download folder below to grab your high quality copies 🙂

Did you enjoy this post? If you are not already a confirmed follower of Wings of Whimsy, please click “Follow” to register and make sure you don’t miss any future posts:
- WordPress-users: in the top left corner of your browser window to register your WordPress-account
- Other readers: in the bottom right corner of your browser window to register your email-address
I have used elements from the following sources for these designs:
Christmas Endpaper – Catnip Studio Collage
French Chocolat Phalier Douelle Receipt – The Old Design Shop
Winter Holly – The Country Yearbook on Open Library
")
 Follow me on Pinterest:


One thought on “Christmas Ornaments Type 5 – Day 2”